Food Rising Float Valve assembly instructions

Posted Tuesday, February 24, 2015, by Mike Adams | Read Comments

Introduction

The Food Rising Mini-Farm Float Valve is a 3D-printable valve that maintains a constant water level in a grow box. This is the key component in non-circulating hydroponics because it maintains what's called a "bottom feeding constant water level" which creates the conditions for root specialization. Root specialization allows plant roots to eliminate the need for complex circulation pumps and air pumps, allowing the entire system to be 100% non-electric.

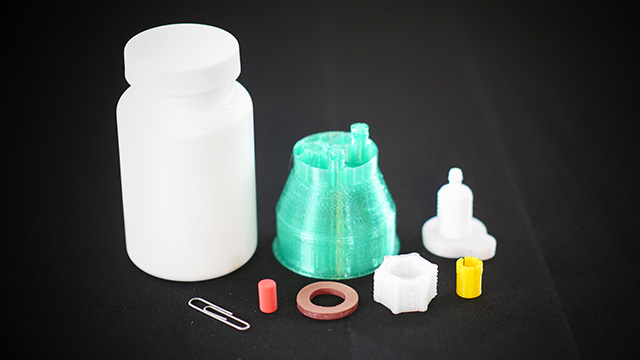
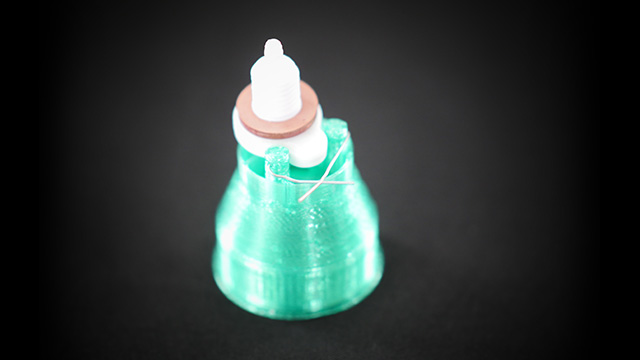
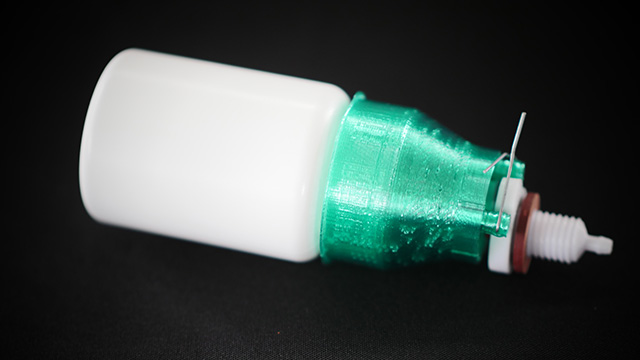
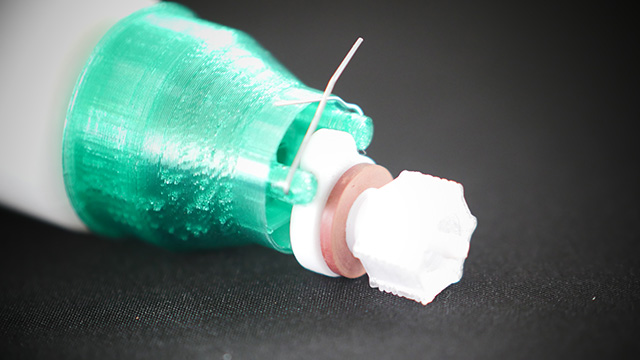
Mike Adams, the Health Ranger, designed the world's first 3D-printable float valve that uses commonly available parts that are easily found in any home (or even scavenged in a war zone). Those parts include a pencil eraser and a paper clip (see below).

Click here to see the full do-it-yourself video of the assembly of these grow boxes.

The part's you'll need to locate:

  • A standard No. 2 pencil eraser. The ideal size is 7mm diameter and 12mm in length, but you can also use an eraser that vary significantly from these dimensions.
  • A standard paper clip. Almost any size will work.
  • A standard garden hose washer like those found at any hardware store. If you cannot find a garden hose washer, you can cut your own washer shape out of a discarded bicycle inner tube or tire.
  • A discarded vitamin bottle with a 47mm lid diameter (a very common size). This vitamin bottle serves as the float.

The parts you'll need to 3D print:

Float Valve Adapter Render

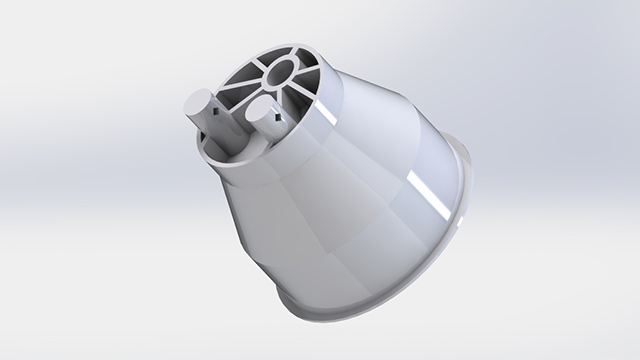
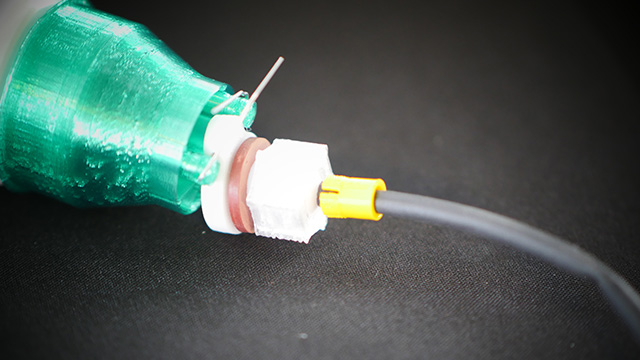
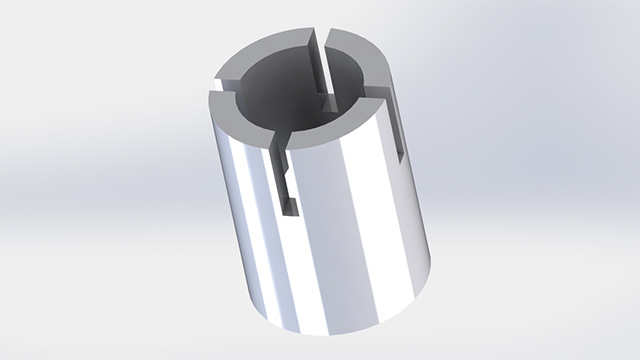
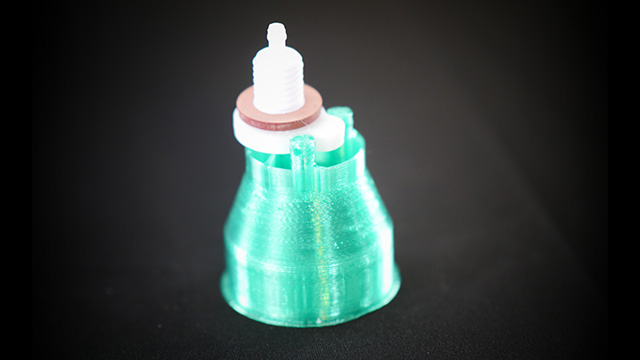
Float Valve Adapter: This part attaches to the vitamin bottle lid to create the float mechanism. It also houses the pencil eraser. This part pivots against the Float Valve Receiver to open and close the water intake hole.

Float Valve Receiver 3D render

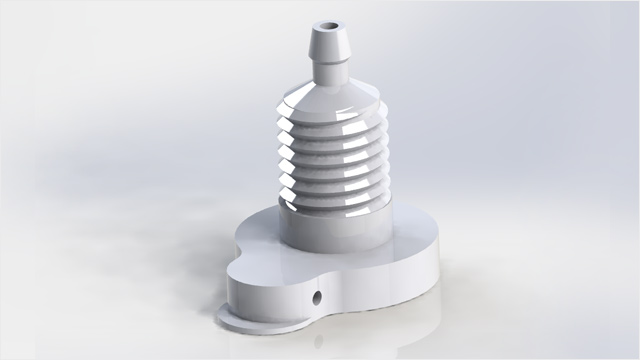
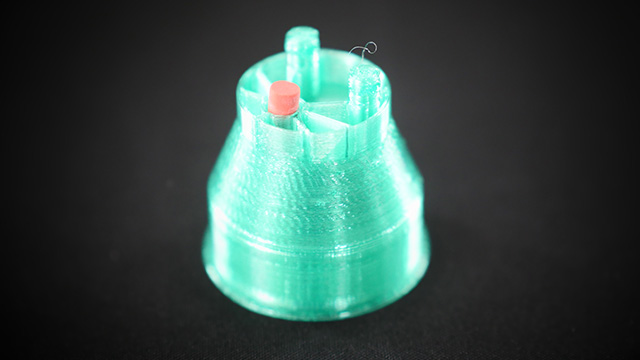
Float Valve Receiver: Contains a small hole at the bottom which is opened or closed by the pencil eraser in the Float Valve Adapter. This part also includes threads so that it can be mounted to the side wall of your grow container and secured using the Retention Nut. Finally, this part also has a drip line nozzle where standard 1/4-inch drip line is attached (RainBird drip line works great). This piece is the most difficult to 3D print and the strength of the top nozzle will be insufficient unless you use t-glase filament and a print nozzle size larger than 0.5mm in diameter.

Float Valve Retention Nu Render

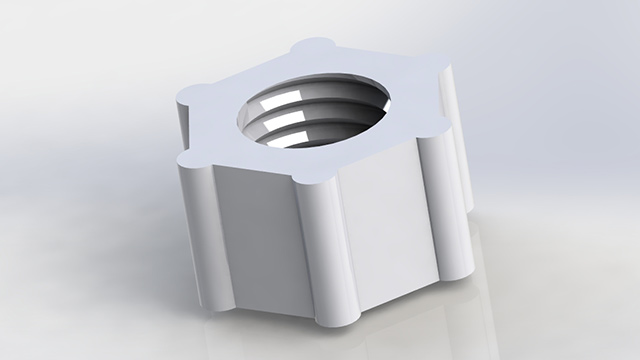
Float Valve Retention Nut: This is a simple nut that screws onto the Float Valve Receive to secure it to the side wall of your grow container. The thread pattern matches the Float Valve Receiver threads.

Compression Fitting Render

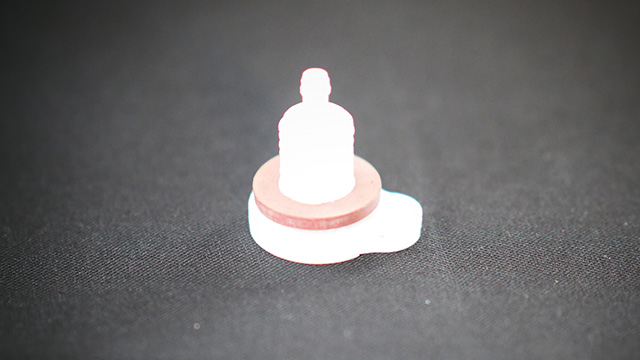
Compression Fitting: An optional part that can help secure the drip line to the nozzle of the Float Valve Receiver. It provides additional pressure to help prevent drip leaks.

Instructions for assembly:

  • Place the garden hose washer over the Float Valve Receiver and secure it to the base of the receiver. Remember, the garden hose washer goes INSIDE the wall of your grow container.
  • Unbend the paper clip to make it a straight piece of steel. It does not have to be perfectly straight, but the straighter you make it, the easier it is to use it.

  • Place the pencil eraser in the top hole of the Float Valve Adapter. IMPORTANT: The pencil eraser MUST stick out about 4mm or so, otherwise the float valve will not function. If your eraser is too short, you can jam small items into the bottom of the hole, such as layers of aluminum foil or string.

  • Now you're going to attach the Float Valve Receiver to the Float Valve Adapter. Place the Receiver on top of the Adapter, with the small "foot" of the Receiver filling the gap between the two cylindrical "feet" of the Adapter. This is easy to recognize because this is the only place where there's a hole for the paper clip to slide through. See the picture below for reference.

  • Once they are aligned, slide the paper clip through them, securing the two objects together.

  • Bend the paper clip on both ends. It doesn't have to look pretty.
  • Now your Float Valve Adapter should pivot against the Float Valve Receiver. This is the pivoting hinge function needed for the water level control.

  • Take the vitamin bottle and secure the lid, making sure it's on tight. Slide the Float Valve Adapter over this lid. It will be somewhat difficult because it is designed to fit very tightly. You now have a working float valve!
  • To install this float valve in your grow box, drill a 15mm diameter hole (just slightly larger than 1/2-inch diameter) in the side of your grow box. Insert the threaded end of the Float Valve Receiver through the side of the grow box. Make sure the orientation of the float is appropriately set to a vertical orientation so that the float will pivot correctly when the water level rises. (In other words, don't install it sideways or upside down. The eraser should be at the top side of the Float Valve Adapter face, and when it pivots, this eraser should cover the hole in the receiver.)

  • If desired, you can also use thread tape (pipe tape) around the threads of the Float Valve Receiver. This has been found to eliminate any slow leaks that might come out through the threads. (Not all 3D-printed parts are 100% water tight. The accuracy of the layers is not perfect.)

  • Now secure the Retention Nut, making it hand tight. Do not tighten with tools, or you will strip the threads of the nut, but make it very secure with hand strength. This will compress the garden hose washer to the inside of the grow box, making a water tight seal on the inside.

  • Now you can attach a 1/4-inch drip line to the nozzle of the Float Valve Receiver. This will require a lot of physical pressure because the diameter of the nozzle is slightly larger than the diameter of the drip line. Some people use a lighter to slightly soften the end of the drip line to make it much easier to insert here, but this step is not required. If desired, you can also slide a Compression Fitting over this nozzle connection after you have attached the drip line.

Important: If you break off the nozzle when attaching the drip line, it means your nozzle does not have sufficient strength. This is caused by trying to print nozzles in ABS or PLA materials which are very fragile. T-glase is the recommend filament material for this object, and your print nozzle size must be 0.5mm or larger in order to have the layer-to-layer strength ("delamination force") to result in a strong nozzle. T-glase filament is available at www.SupplySource.com. If you have printed this part correctly, you will be unable to break off the nozzle using your bare hands, no matter how hard you try.

Testing your float valve

At this point, you can test the float valve. There are two functions the float valve must achieve:

Function #1) Allowing water to enter via the water intake hole, but cutting off the water when the float rises.

To test this, simply fill your water reservoir (a separate bucket or pail), attach the drip line hose and allow gravity to push water through the Float Valve. You should see some water entering through the small hole. The speed of this water is not important (it will be slow).

After a few hours, the water level in the grow box should have risen to the point where the float valve presses the pencil eraser to the hole on the bottom of the Float Valve Receiver. At this point, no additional water should enter the grow box. Test this by filling your water reservoir with water (so that the water level in the reservoir is HIGHER than the water level in your grow box) and waiting a few hours. When you come back to check on it, you should see that the water level remains constant in the grow box.

Function #2) Preventing water from escaping the grow box when the grow box is filled with water (this is the starting condition of the grow box when sprouting new plants).

To test this, simply fill the grow box with water all the way to the top. This will force the float valve to close. Now observe the outside of the Float Valve Receiver. Do you see any water leaking out?

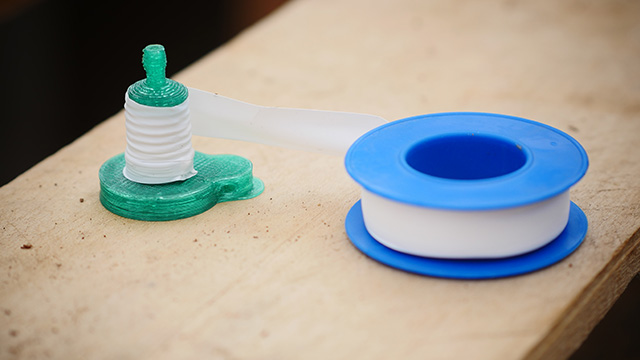
If water is leaking out between the nut and the threads of the receiver, this can almost always be solved by applying thread tape to the threads of the receiver.

If water is leaking out of the nozzle hole, this means your eraser has not sealed well against the water intake hole. Double check to make sure your eraser is sticking out of the Float Valve Adapter by 4mm or so.

If you still see leaks, you may have a bad 3D print where water is seeping through the additive layers of the print itself. This is usually caused by failing to use the proper 3D printer filament (t-glase). In our tests, even Colorfabb filament was not 100% leak-proof and allowed water to seep through the layers at a very slow pace. ABS and PLA should never be used to print the Receiver, although ABS can be used for other parts, if desired.

Got a better solution? Help us design an improved float valve and we'll share it with the world on FoodRising.org while rewarding you with $250 worth of UltraClean Super Plant Food. (Yes, we offer product rewards for awesome 3D object designs!)

Comments

comments powered by Disqus
Facebook
Twitter
Google +
YouTube
Pinterest
Diaspora
Seen.is
tsu
Subscribe for Free Product Alerts & News

Innovations
Free Downloads
News & Articles
Videos
Blog
Science
Gallery

Press
About Us
Support
Contact Us
Donations
Recommended Suppliers