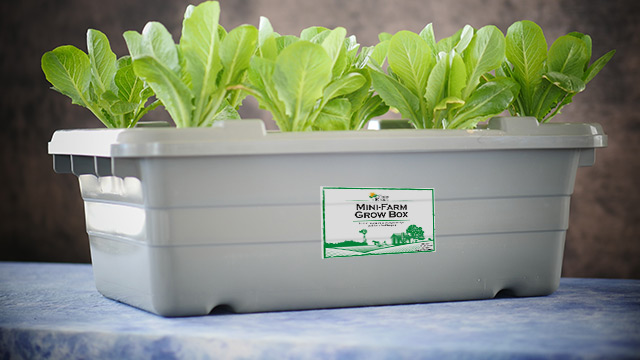
Congratulations on receiving your
Food Rising Mini-Farm Grow Box!
My name is Mike Adams, and I developed this system based on the Non-Circulating Hydroponics principles taught by Prof. B. Kratky at the Univ. of Hawaii.
Here's a straightforward guide for assembling your grow box. Free videos also demonstrate the full assembly if you'd prefer to watch a video guide.
You do not need any tools to assemble this system. :-)
Identify the Parts:
Your Mini-Farm Grow Box should include:
- Grow bin (large container bin)
- Grow lid (with precision-cut holes in the lid)
- 3.5-gallon white pail with lid (the water reservoir)
- Coconut coir grow media
- 1/4" poly micro tubing (5 ft.) drip line
- Net pots (2, 4, 6 or 9 depending on your kit)
- Tube shutoff clamp
- Commercial float valve
- 3D-printed float valve (if included as a bonus with your grow box)
- UltraClean Super Plant Food: 1 lb. of a specific formula (such as lettuce) and 1 lb. of CalMag (which all plants need)
This is everything you need to get started.
Assemble the System:
- Install the float valve in the side wall of the grow bin, where a hole is pre-drilled for your convenience. You may choose to install either the commercial float valve, or the 3D-printed float valve. They both operate on the same principles. Click here for a detailed article with photos that show you how to assemble the 3D-printed float valve. (We
usually ship them already pre-assembled.)
- Attach the 1/4" drip line to the external nozzle of the float valve. This provides a water source that feeds the grow bin.
- With a pair of scissors held at a 45-degree angle (or so), cut the other end of the 1/4" drip line, creating an angled end that can be easily inserted into the pre-drilled hole in the 3.5-gallon pail.
- Insert the angled end of the 1/4" drip line into the pre-drilled hole of the water reservoir, allowing the tubing to extend approximately 2 inches into the reservoir. (The actual insertion depth is not very important.)
- Unwrap the plastic of the coconut coir grow media. Place the coconut coir into a separate container or bin (such as a small pail or bucket) and add a few inches of water to the bottom of the container until the coconut coir expands and loosens. This will take 15–20 minutes for the expansion. Once it is fully expanded, you can loosen it by hand to make loose coconut coir media. This is the
media which will host your garden seeds.
- Fill your net pots with coconut coir media. Compress it slightly, but not vigorously. The coconut coir should be filled all the way to the top of the net pots, but should not be too tightly compressed. (Roots need loose media to grow well.)
- Place the net pots containing coconut coir into the holes of the grow box lid. They should fit snugly. Place the lid to the side for now.
Test the Water Flow:
The Mini-Farm Grow Box is a self-watering system. You never need to add water or nutrients to the grow bin itself. Instead, you add water and nutrients to the water reservoir (the 3.5-gallon pail).
If you wish, you can use a larger pail or other container to create a larger water reservoir. One reservoir can feed water and nutrients to 10+ grow bins!
Before planting seeds, it is important to test the gravity flow of the automatic watering function of the grow box:
- Confirm that you have the float valve installed with the correct orientation inside the grow bin. The float should actuate vertically (up and down) when you gently lift it with your hand. This simulates the rising of the float as the water level rises in the grow box.
- Confirm you have the 1/4" drip line connected securely to the float valve nozzle, with the other end securely inside the water reservoir (white pail).
- Normally you will want to position the water reservoir a few inches higher than the level of the float valve of your grow box. This allows the water to gravity flow down to the level of the float valve. To accomplish this, you may place a 4" brick or a similar-sized object underneath the water reservoir (white pail).
- Fill the white pail completely with water. You should now observe a slow trickle of water entering the grow box through the tiny hole in the center of the float valve. This is the desired flow you want to see.
- Check for leaks on both ends of the 1/4" drip line. You may see small, slow drips if either end is not securely attached. If you notice small leaks, secure the drip line more securely. If you notice a leak on the 3D-printed Float Valve Receiver nozzle, check the nozzle for uniformity. Some nozzles print with "hanging filament" that must be removed with a fingernail clipper or other
small tool. (3D printing is not yet an exact science. Some parts still have small artifacts of the melted filament printing process.)
TIP: You may also use the "compression fitting" to further secure the 1/4" drip line onto the external nozzle of the Float Valve Receiver. Simply disconnect the 1/4" drip line from the nozzle, slide the compression fitting over the drip line, reattach the drip line to the nozzle, then slide the compression fitting over the drip line where it attaches to the nozzle. It should
be a very snug fit and may be slightly difficult to push on.
TIP: If you decide to drill your own hole for a larger water reservoir, use a drill bit with a diameter of 15/64". This is a common size in many drill bit sets.
- Allow the water to fill the grow bin until the float valve rises sufficiently to block the incoming water flow. At this point, you should have approximately 2 or 3 inches of water in the bottom of the grow bin, and a much higher water level in your water reservoir. Allow this state to remain for a few hours to make sure your float valve really is blocking off the incoming water. If the water level
does not rise higher in the grow bin, then you have confirmed the float valve is working to block the incoming water, just as it is designed to do.
TIP: If you place your water reservoir too high, it will increase the gravity pressure of the water and may cause excess water to be pushed into your grow bin. Do not raise the water reservoir higher than approximately 6" off the level surface where your grow bin is also placed.
- Now it's time to test the ability of the grow bin to RETAIN water when it is nearly full. Please fill the grow bin to about 3" below the top of the bin and observe the outside of the float valve. Ideally, you will not see any water leaking out of the float valve. This indicates the float valve is now blocking the water that's inside the grow box from escaping out EVEN WHEN THE GROW BIN IS
FULL OF WATER.
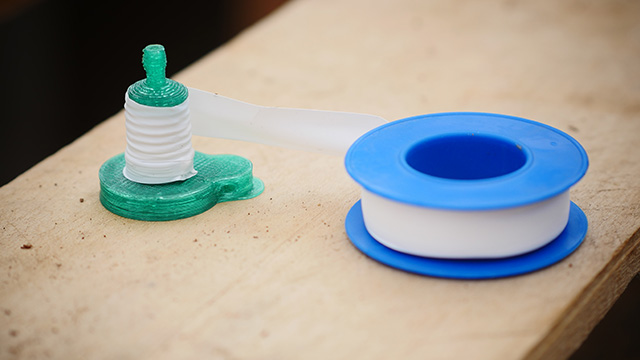
If you are using 3D-printed parts, you may notice a slow drip of water escaping through the threads of the Float Valve Receiver. The solution for this is to wrap the Float Valve Receiver threads with "thread tape." This is commonly available at hardware stores and is used for plumbing pipe connections. The reason this is sometimes needed is because of the imprecision of 3D printing: today's
technology cannot yet print ultra-precise threads which are 100% water tight by themselves. The thread tape "fills in the microscopic gaps" of the threads, creating a water-tight connection.
- You have now confirmed the full function of the grow system! If you used a high-quality water source to begin with, you may now add nutrients directly to the water in the grow bin (only needed once, at the beginning of each new "crop") and also to the water reservoir.
TIP: Acquire a TDS meter (about $15 on Amazon.com) to test your water for Total Dissolved Solids (TDS) and Electrical Conductivity (EC).
TIP: As a rule of thumb, you will add plant nutrients and CalMag formulas in about a 1:1 ratio to the water, aiming for a TDS number of approximately 1200 - 1500. For more detailed instructions, see FoodRising.org for a comprehensive guide on hydroponic nutrients for various plants.
- You may now place the lid on the grow bin, making sure the bottom half inch or so of each net pot is immersed in the water being held in the grow bin. This assures water reaches the coconut coir and allows your seeds to sprout. Over time, as the water level drops in the grow bin, your plants will grow roots to follow the water down, extending to the bottom of the grow bin where fresh water and
nutrients are fed through the float valve.
- You may now plant your favorite seeds! Make sure the system has adequate sunlight and watch Mother Nature perform its food miracles!
Have a suggestion on how we can improve the system? Email us at [email protected]